

Running a smooth and fast website is no longer considered high-quality – it has become imperative.
If your goal is to run a perfect website and correct errors quickly and efficiently, you will have to perform experiments frequently. There is a number of ways to do this, and developers usually prefer some techniques to others.
However, one of the best and versatile testing methods is definitely Google Optimize.
In this overview, we will present:
- What is Google Optimize
- How to access Google Optimize
- Different features of the program
- How to use it to run experiments
What is Google Optimize?
Optimize is Google’s tool that enables you to learn more about the behavior of your visitors and to use the insight to optimize your website’s performance.

It’s one of the most detailed solutions for analyzing the way your customers engage with your site. There are many other tools that do this too, but Google does it using their own tools (Analytics) and offers the service for free.
By building their data on Google Analytics, you can use the stats that you have compiled so far to test the most important parts of your website and identify which ones are in need of urgent fixing.
For your experiments, Google Optimize utilizes Bayesian statistical methods in order to model its real-world performance, which gives you higher accuracy and better results.
Also, in the classic Google style, Optimize will give you the most advanced targeting options available in the entire industry. You can use this sophisticated tool to provide the right experience to the right customers at the right time.
How to Access Google Optimize?
Google Optimize is easily accessible on Optimize.Google.com, which will redirect you to the Accounts page.
Click on the Get Started button. If you’re entering Google Optimize for the first time, you will be prompted to opt-in or out of Google’s newsletter services related to website optimization. If you’re just starting out in this area, sign up for their newsletter is definitely a good idea as they’re very insightful and helpful for beginners.
Next, you will have to adjust your account settings. There are three options that you can choose to participate in or not, and all three are recommended:
- Improve Google Products (shares Optimize data with Google)
- Benchmarking (shares anonymous data to aggregate data sets)
- In-depth analysis (allows Google’s sales team access to your Optimize account)
Check or uncheck these settings and accept the Terms of Service, GDPR, and Controller Data Protection Terms.

Experiment types in Google Optimize
There are four types of experiments that you can run within Google Optimize:
1. A/B tests
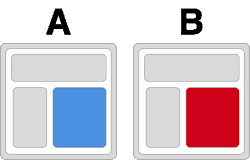

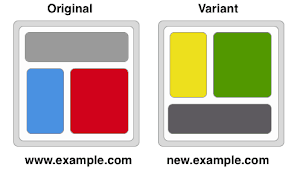
An A/B test is an experiment that features the original version of the web page stacked against its modification in order to find out which performs better.
There has to be at least one element that’s different in A and B versions, and it’s recommended to keep the number of differentiating elements as low as possible to get the most precise insight.
When you do A/B testing with Google Optimize, it will capture the results of performance based on the objective you’ve set for the experiment and identify the leader.
2. Multivariate tests (MVTs)
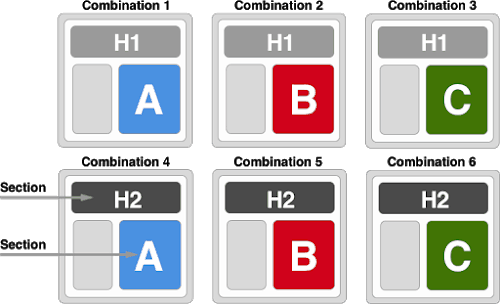

An MVT (Multivariate test) is similar to A/B testing in a way that it also compares different elements and their performance, but it’s done with more than two variations.
There are a lot of benefits to doing multivariate experiments on your website. Unlike A/B testing, Optimizer will not only show you the best-performing variant, but it will also identify best-performing elements in interaction with the other elements on the page.
3. Redirect tests

If you want to experiment with a complete overhaul of your web page, you would want to stack up against your original page with a one that’s radically different.
This is usually not done in A/B tests, which usually perform more precisely the less different elements there are.
A split URL test (redirect test) will allow you to test completely separate pages and stack them against each other. In this case, variants are defined by path or URL and not by elements like in classic A/B testing.
4. Personalization
If you’re an experienced marketer, you know that targeting is everything. Another aspect of Google Optimization important for targeting is personalization.
This is a group of changes that you make to your website based on who is visiting it. In order to develop these groups, you can use Google’s sophisticated segmentation and targeting tools.
Personalization is not an actual experiment, as it doesn’t have variants, and it doesn’t have a set end time.
Using Google Optimize to Confirm or Disprove Hypotheses
The basic function of Google Optimize is to negate or confirm a hypothesis related to a website’s current performance. Using knowledge and experience, marketers set up a hypothesis that ‘if they do X, Y should happen’.
Even though being educated and experienced helps, no website change should be deployed without testing its performance first. When you look at some of the biggest websites on the Internet, you can be sure that even the tiniest speck on the site has been tested for optimal performance.
So, every Google Optimize experiment should start with a hypothesis, just like any other scientific experiment. Here is where you use your knowledge and experience to make assumptions on what will work best on your website.
A hypothesis consists of the factors that will be changed, the expected outcome, and optionally the reason for expecting this outcome.
For example, here are some of the basic hypotheses that you can test with Google Optimize:
- If we move the primary call to action, the conversion rate will go up.
- If we move the primary call to action below the fold, the conversion rate will go up by 10%.
- Showing cross-sell products on the right column will increase the average order value.
- Showing up-sell products on the left column will increase the average order value.
Of course, it’s possible to create and launch an experiment without setting a hypothesis, but starting your experiment in this way is a guarantee that you will never lose track of the goals of your test.
How to Create an Experiment on Google Optimize
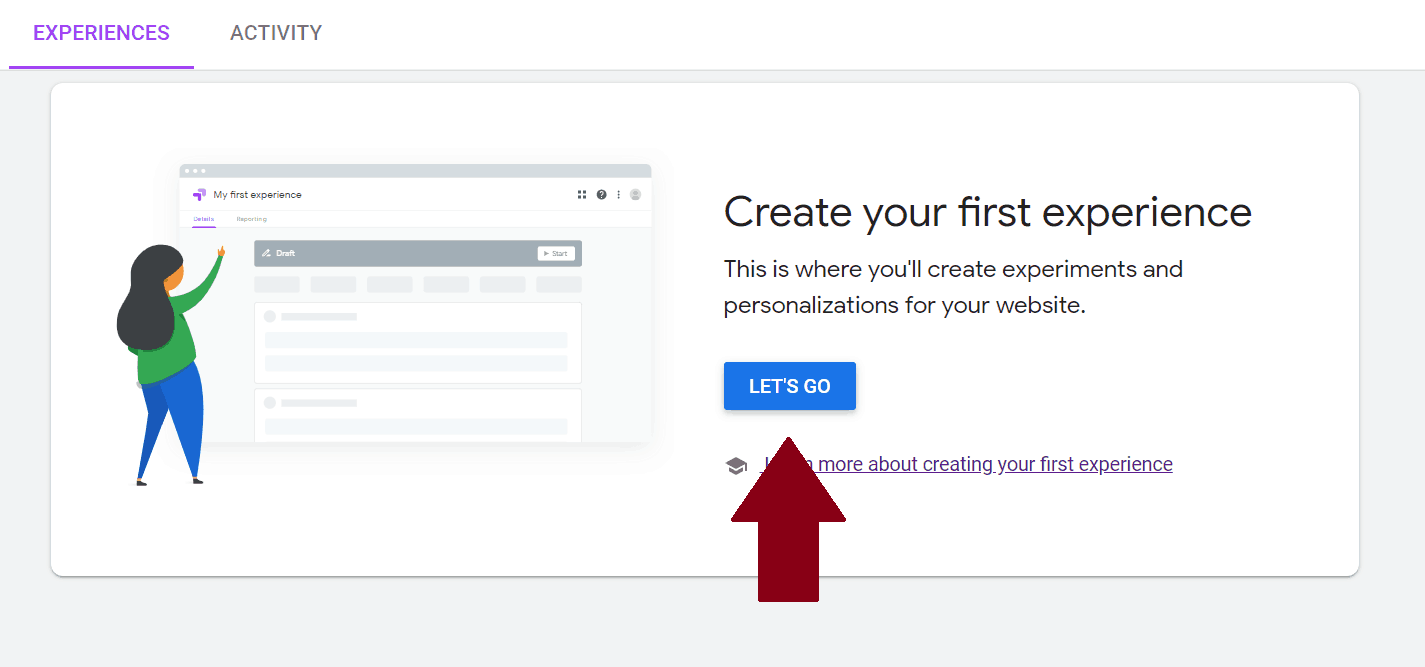
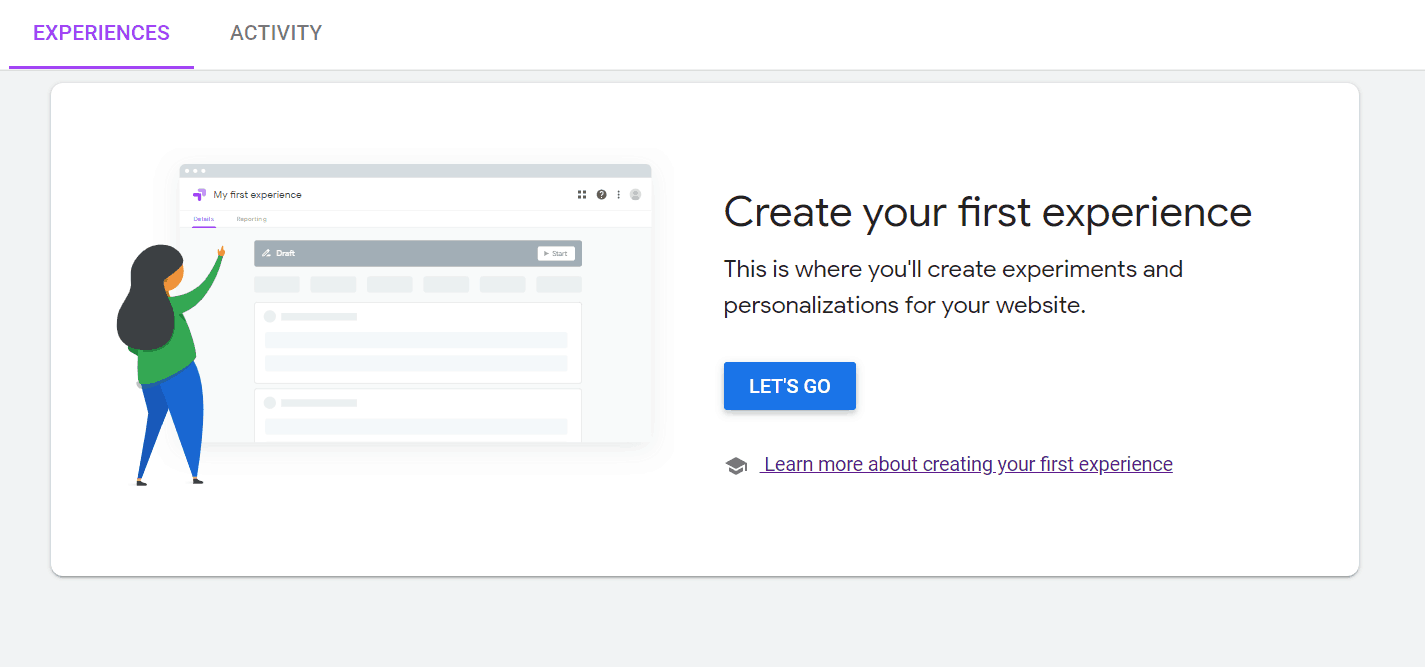
From the ‘Experiences’ dashboard that’s default as soon as you sign in to Google Optimize, click on ‘Let’s go’ at the center of the screen.
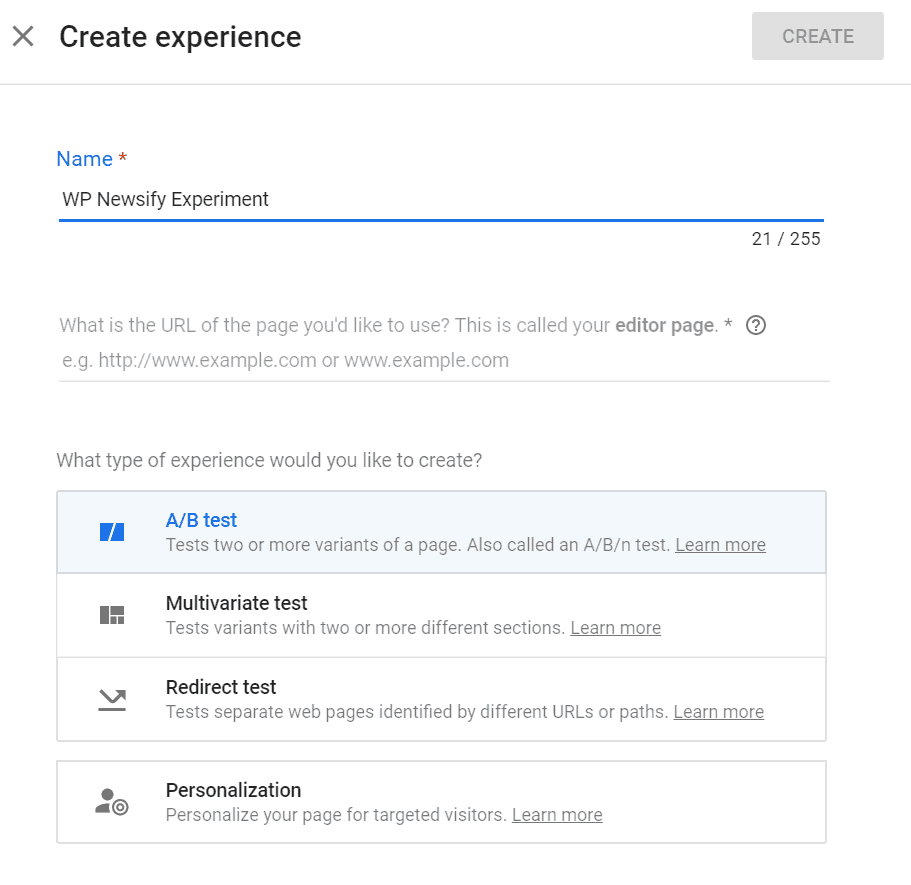

You will need to come up with a name for your experiment. It’s best to use a name connected to your hypothesis so that it would be easier to recognize it later when you’re running multiple experiments.
You will also choose the type of experiment you want to run. For the purposes of this guide, we will create a simple A/B test.
By clicking on ‘Submit’, you will be redirected to the home dashboard of your newly-made experiment.
Add Targeting Rules
This step is optional, and you can skip it and go straight to variants if you don’t want to use targeting.
However, if you want to precisely target a particular type of audience that you want to perform your test on, find the ‘audience settings’ in the Targeting and Variants section.
Google Optimize will allow you to segment and precisely target the audience you want, allowing for an even more insightful testing experience. You can use the following categories when you’re creating a targeting test:
- device category (whether you target users on desktop, mobile or tablet)
- behavior (whether you target new or returning or referred visitors)
- location (target audience from a specific country, region or city)
- technology (target audience who uses a particular device or OS)
There are also many advanced features for targeting that you can use to specify your desired audience further.
Google Optimize also allows you to import an audience model from Analytics or Adwords.
Create Variants
Variants are the most important parameters in Google Optimize experiments: they are actually the two versions of a web page that you’re stacking against each other. In order to start creating variants, click on ‘Add Variant’ in the Targeting and Variants section.
You simply need to create a name for a variant, and it will be added to the variant queue right after you click Submit.
In order to change the variants and actually determine what elements will differentiate the original variant and the proposed change, you need to edit the variant B.
The easiest way to do this is by installing a Google Optimizer extension.

You can click on Edit to start customizing your variant(s). For example, if you want to change the color of your call to action button and see how it reflects on conversions, simply click on that element in Google’s visual editor and change it.
Link to Google Analytics
In order for your experiment to produce results and information about your variants’ performance, you need to link your Optimize account to Google Analytics.
In the Measurement and Objectives section, click on ‘Link to Analytics’. Here, you will see a list of all sites connected to your Google account.
You should select the property you want to test and click on ‘Link’. You will then get an HTML snippet that you should add to your Analytics admin.
Specify Objectives
Now, it’s time to specify the exact objectives that you want to achieve with this performance test. Optimize will automatically take all the objectives that you’ve created in your Analytics account. Also, it’s possible to add a custom objective.
Settings
Now, the only thing remaining before you can run your experiment with Google Optimize is to go through 4 settings.
First, you will have to ‘Run Diagnostics’ – confirm that Google Optimize is correctly installed and set up.
Next, you will have to opt-in or out of email notifications related to this event.
You will also see the current traffic allocation for the experience you’re creating and have the opportunity to change it.
Lastly, you will have to specify whether the experience is triggered upon page load or some other custom event.