
Timeline Editing 101: Zooming and Zoning In on Frames Without Quality Loss
In the ever-evolving landscape of digital media production, timeline editing stands tall as one of the most vital skills for any video editor. Whether you’re crafting a cinematic masterpiece, a YouTube vlog, or a social media reel, your ability to navigate frames with precision—without compromising quality—is what separates amateurs from professionals. If you’ve ever wondered how experts zoom into the minutiae of a frame without pixelating their footage, or how to focus on just a few seconds of video to make surgical edits, you’re in the right place.
What is Timeline Editing?
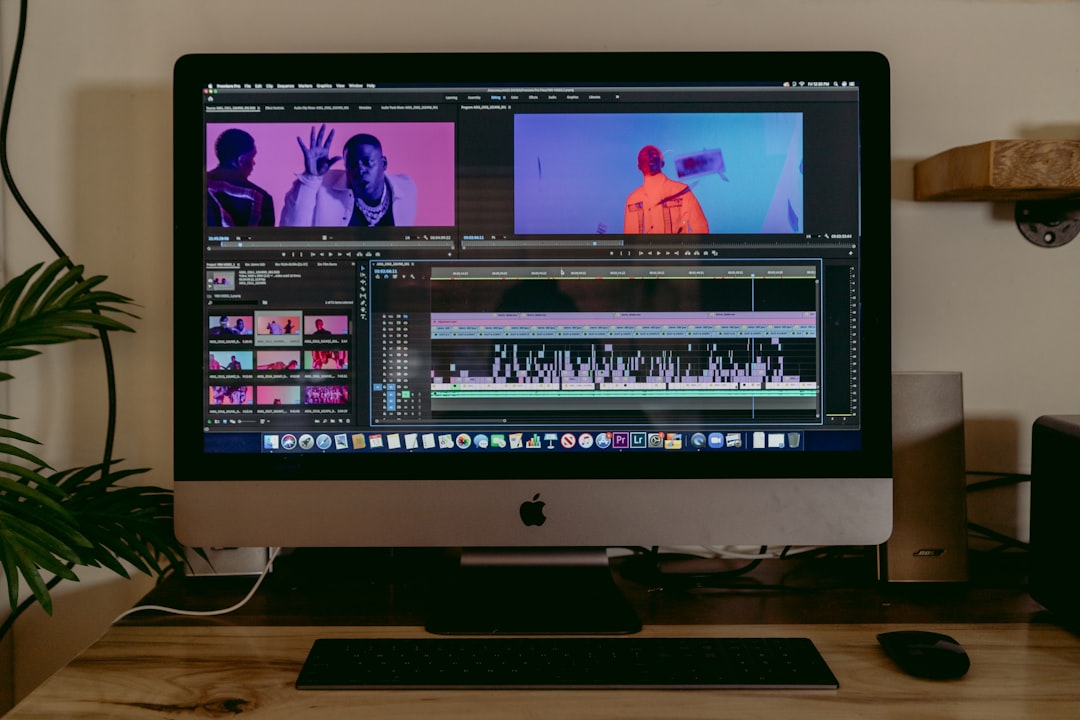
Timeline editing refers to manipulating video, audio, and image assets on a linear timeline interface provided by most non-linear editing (NLE) software like Adobe Premiere Pro, Final Cut Pro, or DaVinci Resolve. This editing system allows creators to:
- Trim and splice video segments
- Add transitions and effects
- Synchronize audio with visuals
- Zoom into specific frames for detailed editing
The ability to zoom and navigate with frame-level accuracy not only enhances creative control but also ensures superior output quality.
The Zoom Tool: An Editor’s Magnifying Glass
Zooming into a timeline doesn’t mean you’re enlarging the video file itself—it means you’re increasing your visual scale of the timeline to inspect individual frames more closely. This is a crucial distinction, as it enables very precise edits without affecting video resolution.
Most NLEs have similar methods for zooming in:
- Using the + and – keys to zoom in or out
- Dragging the timeline zoom slider
- Scrolling with a mouse wheel while holding a modifier key
By zooming in to view frame-by-frame changes, editors can perform tasks such as:
- Frame-perfect cuts
- Inserting transitions at just the right moment
- Synchronizing audio to lip movement
This functionality is especially important in action scenes, interviews, and music videos, where timing is everything.
Maintaining Quality in High-Precision Edits
When zooming in on video during playback or editing, it’s important to understand that you’re working on a digital preview, not altering the original resolution. However, problems begin to arise if you start cropping or scaling actual footage in post-production. Here’s how to avoid sacrificing quality:
- Use Lossless Codecs: When exporting clips for tight editing, use codecs like Apple ProRes or DNxHD to preserve quality.
- Work at Native Resolution: If your footage is in 4K, edit on a 4K project timeline. Downscaling later retains quality better than upscaling.
- Avoid Over-Zooming on Scaled Footage: Zoom effects should use the original resolution. Pushing beyond 100% scale can introduce blurriness.
- Proxy Editing: For smoother editing in high-resolution projects, use lower-resolution proxy files that are later linked back to the original high-res footage for export.
What is Zoning In?
While zooming refers to scaling your view, zoning in involves focusing your attention and adjustments on a specific part of the timeline. Think of it as selecting a chunk of clay in digital sculpting—this is where you’ll shape detail.
In editing terms, zoning in allows for:
- Applying effects to isolated segments
- Color grading specific scenes
- Focusing audio adjustments on certain parts
Most software enables zoning by letting you:
- Use in/out markers to select a region
- Create nested sequences for isolated control
- Employ adjustment layers over defined sections
Advanced zoning helps compartmentalize complexity and enhances your ability to maintain consistency. For instance, you might zone a 30-second talking-head segment for audio cleanup, while another gets stylized with dramatic color grading.
Frame-Level Editing Best Practices
Zooming and zoning into frames becomes a surgical endeavor—requiring care, precision, and technical know-how. Here are some best practices for mastering this process:
1. Enable Frame View
Most editing tools allow you to switch between clip view and frame view. The latter gives you thumbnails for each frame, making it easier to choose cut points and transitions.
2. Sync to Beats and Motion
When editing music videos or dynamic reels, align cuts with beats and visual motion. Timeline zoom helps you line up cuts within milliseconds accurately.
3. Add Markers
Use timeline markers to flag important frames—these are essential during collaborative editing workflows and when revisiting the project later.
4. Take Advantage of Snapping
Enable snapping features so clips and effects align perfectly with the timeline grid or playhead. This ensures no accidental gaps or overlaps.
5. Use Waveforms for Audio Precision
Zoom into audio waveforms when syncing dialogue, beats, or effects. You can time visual frames to the actual rise and fall of sonic waves.
When Quality Loss Happens
Even with the best intentions, quality degradation can creep in if editors don’t watch out for the following mistakes:
- Excessive Scaling beyond native resolution
- Rendering with Lossy Formats like heavily compressed MP4s during editing rounds
- Multiple Re-Exports before final delivery
- Low-Resolution Proxies used incorrectly in final output
To avoid these pitfalls, always:
- Edit with high-res footage and high-quality preview settings
- Render your project only once in its final form
- Use software-specific export presets optimized for your platform (e.g., YouTube 4K, Instagram reels)
Why Frame-Level Editing Matters
At first glance, spending hours on just a few seconds of video may seem inefficient, but the rewards are immense. The difference between an amateur cut and a professional one often lies in mastering timeline subtleties. Whether it’s an action sequence timed to perfection, or a dialogue scene enhanced through tiny audio tweaks, frame-level editing enables storytelling with finesse.
More than just technical skill, developing an eye for such details is an art. And like all art forms, it gets refined with practice, feedback, and the right tools.
Final Thoughts
Zooming and zoning in on your timeline isn’t merely about making things bigger onscreen—it’s about bringing your viewer closer to the story you want to tell. When executed correctly, this technique gives you unmatched control over timing, quality, and viewer impact.
If you’re aiming to elevate your editing game, focus less on shortcuts and more on precision. Commit to mastering timeline tools, and soon your edits will not only look better—they’ll feel better to your audience.
Remember: every frame counts. So get in there, zoom tight, zone smart, and edit like a pro.

- Remote Desktop Error 0x204 Explained: Why It Happens and How to Fix RDP Connection Issues on Windows - February 17, 2026
- How to Fix “Error at Hooking API LoadStringA” in Rainbow Six Siege (Easy Anti-Cheat Solutions) - February 17, 2026
- Top 5 Underrated CRM Tools Agencies Prefer Over HubSpot for Lean Client Management - February 17, 2026
Where Should We Send
Your WordPress Deals & Discounts?
Subscribe to Our Newsletter and Get Your First Deal Delivered Instant to Your Email Inbox.


