Why and How to Use the Login Plugin for WordPress
One of the useful tools which can be used for creating a website is a Login plugin. Without any doubt, everyone even once came across with a popup which said “Log in” or “Sign up” for getting more information or posting something on the page, leave some comment or review. Actually, this tool can be applied to a website which has some information that should be presented to a minority of people only and not to all visitors.
Besides, it can be applied not only by visitors but even by a website creator. In the WordPress community, these aims can be reached by a Login plugin which I am going to present in this post. But before starting the trip through the Login plugin let me present some example of this tool used in different websites.
So, if we go to the one of the most popular website of images and different ideas Pinterest we can come across with the following popup even without seeing some initial information.

This popup consists of two parts: the login information itself and the picture.
Usually, the required information that is presented in different kind of popups is the same, but the only differences are in its style and design. Thus, they all serve the same aim but do this in miscellaneous ways.
Now let’s pass to the Huge-IT Login plugin and see what possibilities does it have. After installing the plugin it is necessary to go to a dashboard in order to get acquainted with a plugin and find out its options and features.
Login Plugin Options and Features
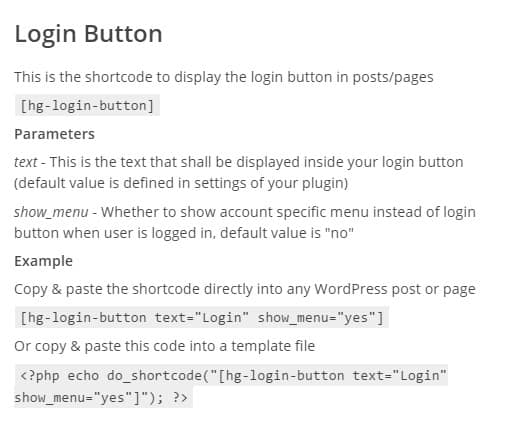
The instruction and information about the plugin consist of three main blocks. The first rose one is related to the Login Button. In this block, the most important information that needs to be pointed out is “text”, “show menu” and the main shortcode. If we take a shortcode from the example which is necessary to add to a page or post, then we can see that a text of a button can be changed directly from the shortcode. [hg-login-button text=”Login” show_menu=”yes”]
If we replace “Login” word with another word for example “Subscribe” then the Login button will turn to the subscribe button. Same is with a “show menu”.
The second block is a “sign up” block, which is working exactly in the same way like a “Login” button.
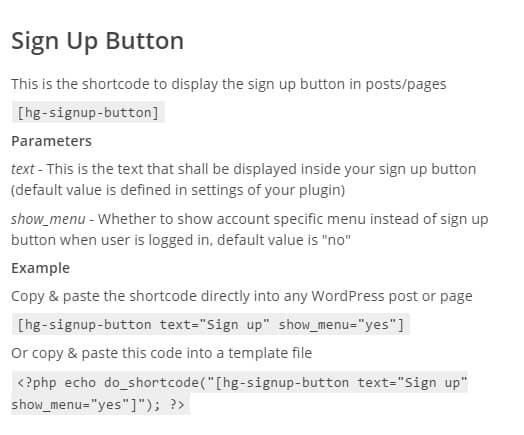
And the last block is the one which directs a website creator to the Settings option where the plugin can be modified.
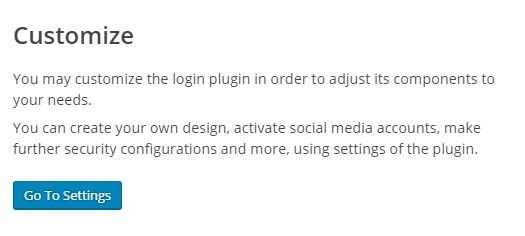
So when w a website creator goes to settings block, he/she can discover that it consists of four main options: general, social, design and security.

Let’s start from the end and go to Security option. This option is designed for a Recaptcha security, which can be found in other plugins such as forms as well.
So, in order to add a Recaptcha key to the popup, it is necessary first to get them from Google. After clicking on “get your ReCaptcha” key a website creator will be directed to another page:https://www.google.com/recaptcha/admin#list where the key will be generated. First of all, it is necessary to write a domain name.
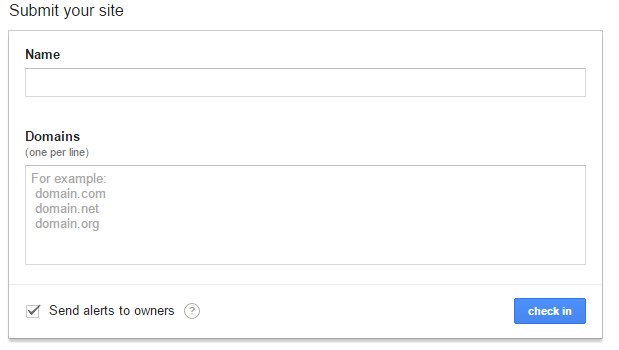
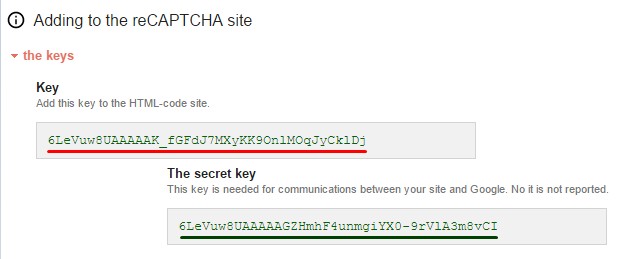
After writing it two main keys will appear on the page. That is Recaptcha key and Recaptcha secret key.
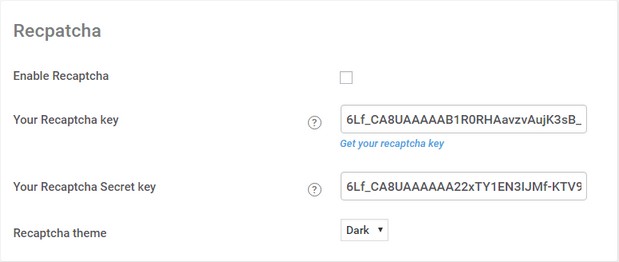
In order to use these keys, a website creator just needs to copy them and just fill in the required fields. Besides, there are two main designs for the Recaptcha option: dark or light.
So, when a security option is ready it is a right time to add a shortcode to the page and see how the popup looks. After adding a shortcode to the page there will appear a “sign up” or “log in” button depending on the shortcode which a website creator decided to use. For example, I added a shortcode of sign up button. It can be used for websites which need some subscription for becoming a part of a website. After clicking on the “sign up” button the following popup will appear. There is required information of name, email, and password. This is a default popup which is designed by a plugin creators. However, they give an opportunity for changing its appearance.
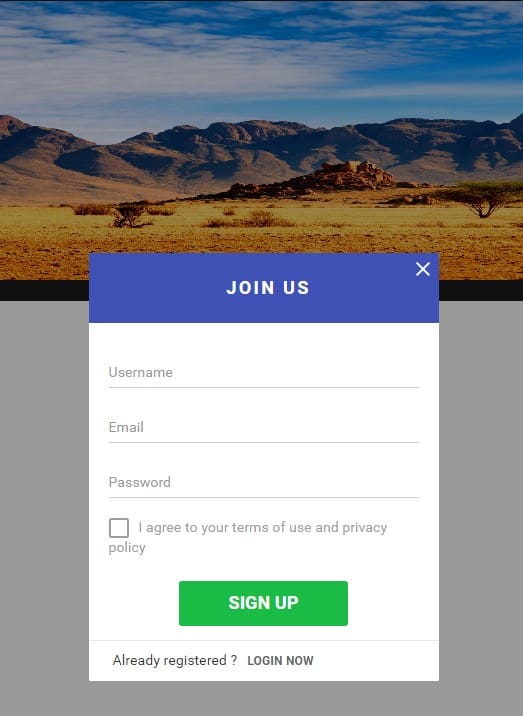
Logically, the second “Design” option is created for adjusting the popup style to one’s taste and overall website design. There are separate options for “sign up” and “login” buttons, for the popup itself and for the text in it. It is possible to change their header text color, close button color, facebook button color and even error message text color. So, after testing all these options it is possible to get pretty nice results which I’ll show at the end of the post after going through all option of the Login plugin.
The next is “Social” option. For enabling this option it is again necessary to use the link which is added under the Facebook APP ID field.
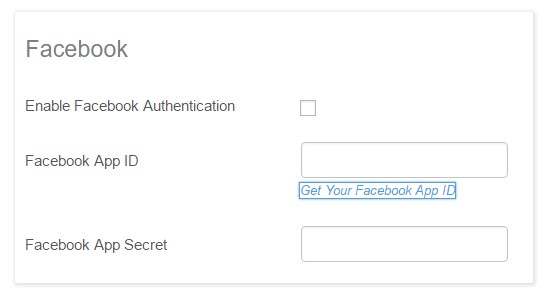
For getting this ID it is necessary to create an application with the help of the following link and get Facebook ID: https://developers.facebook.com/
If we pass to the first screenshot of Pinterest it is obvious that this option is used in its popup as well. Actually, it is very useful to have this Facebook button as well because it gives an opportunity to log in with the ready information and not create a new account. This can save their time, so it is really important to use this way of being logged in or signing up.
And the last but actually the first option is a “General” one. Under this option, it is possible to change “login” and “sign up” texts, change account options, the text of reset password popup and work with global options.
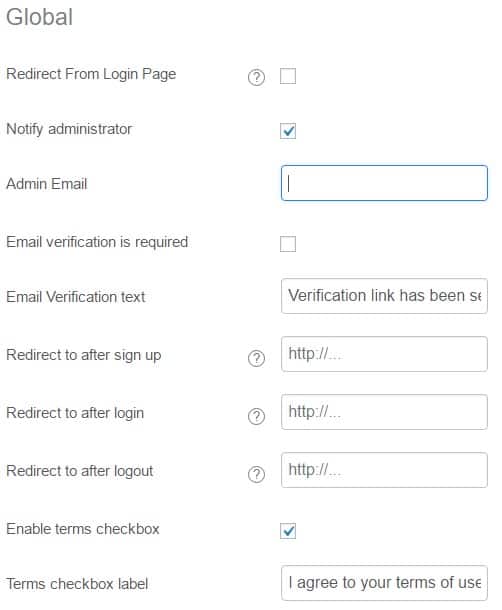
“Notify administrator” option will inform the administrator of the website that some has logged in or signed up. This option is very important because it gives an opportunity to follow up visitors’ activity and website’s popularity. Besides, it is possible to direct a visitor to the certain page after sign up, login or logout. Terms of agreement can be presented in the popup or not be included in it.
Overall, there are options which can help a website creator to have such kind of a popup. After going through the whole plugin, getting acquainted with its options and functionalities it is a right time to add this Login popup to the page and see how it is working. This plugin, like many other plugins, is working with the help of shortcode. In order to take a shortcode, it is necessary to go to the beginning(to the dashboard in the plugin) of the post and use a shortcode which is vital for this or that website. For example, this one: [hg-login-button text=”Login” show_menu=”yes”]
After adding a shortcode to the page, publishing it and opening the page the picture of administrator who is already logged in will appear. Surely, this is not what a website creator was expecting from the Login plugin but this happens because he/she is already logged in to the website and he/she is an administrator of it. As I have already mentioned, this plugin can be used not only by visitors and other users but also by an administrator of the website. In order to see the work that a website creator has done, he/she needs to copy the link of the page where the shortcode is added and open it with the help of Incognito (ctrl+shift+N). Here is what a website creator will get.
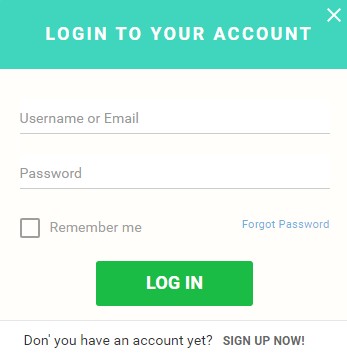
So, this is the final version of the popup which I got playing with design and style options. I am sure that this plugin can find its usage and can be applied to any kind of a website despite the fact of its content. It has a wide range of functionality because not all plugins can serve both for administrators and visitors of a website. Anyone can test this plugin and find out its great advantages and opportunities.
- How to Create Beautiful Image Galleries with Free WordPress Plugins - June 5, 2017
- How to Create Your Online Video Player in WordPress - February 28, 2017
- How to Create Amazing Popups for WordPress - January 17, 2017
Where Should We Send
Your WordPress Deals & Discounts?
Subscribe to Our Newsletter and Get Your First Deal Delivered Instant to Your Email Inbox.

