

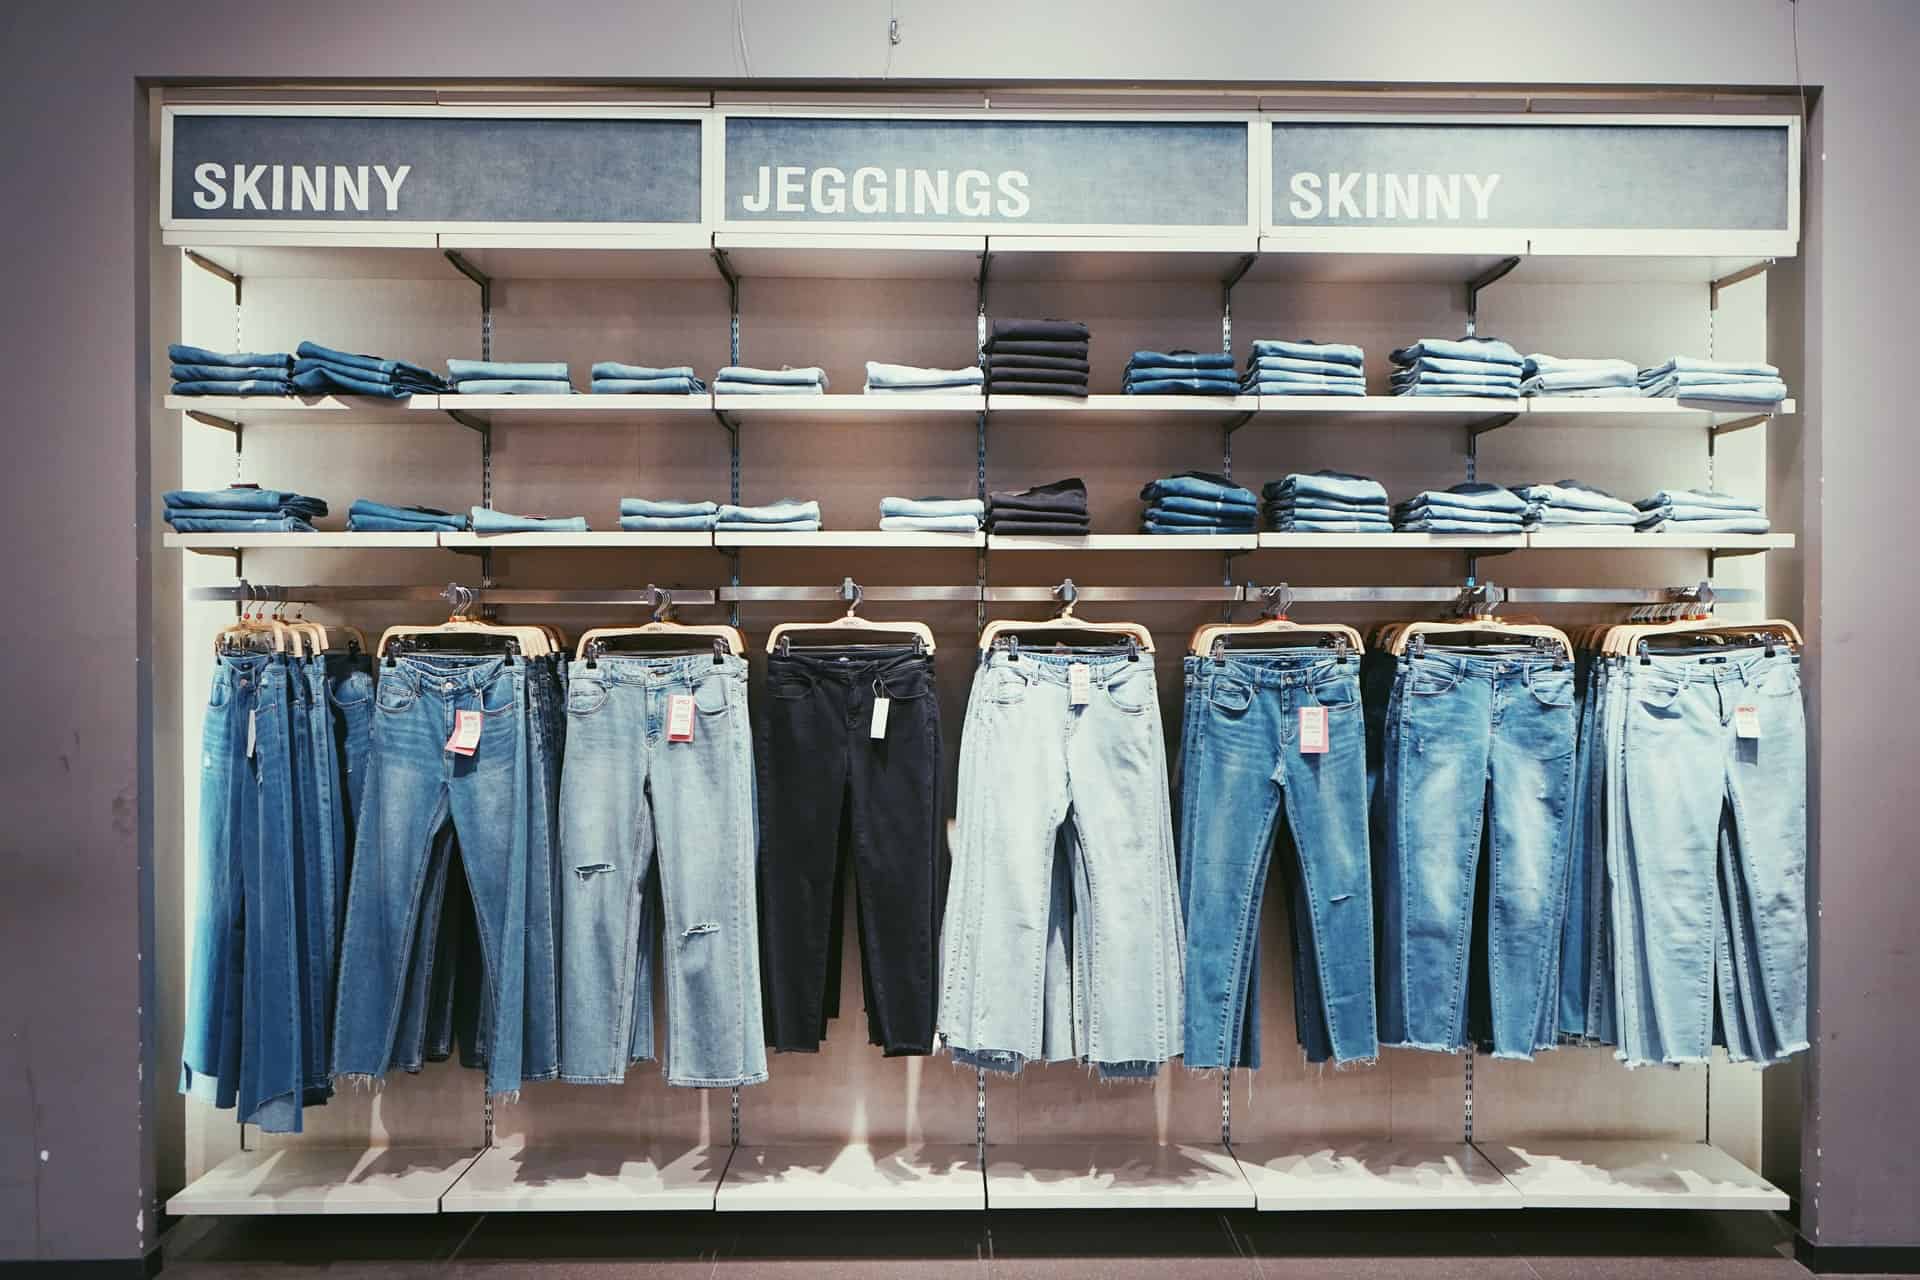
Apparel sizing can be a pretty big problem both for shoppers and businesses. Just think about how many items in your wardrobe are the same size, probably not many, right? The problem mainly lies in the fact that apparel sizes are not standardized at all, and we’re not talking just Asian vs. European brands or something equally as far removed.
You can try on a pair of pants of the same size in a single store and find that one is too large and small, especially if the store carries items from more than one supplier. But how does this affect WooCommerce business owners? It’s pretty simple. If your buyers get the wrong size, they’re going to return the items. This will, in turn, not only significantly lower your profit margin but will also increase production and labor costs.

Not to mention the significant decrease in conversions because if the buyer is unsure of the size when shopping online, they’re way less likely to purchase the garment. When it comes to WooCommerce and the fashion business in general, thankfully, this problem can be solved by using the appropriate sizing tool. Utilizing a sizing tool that recommends the proper fit and size for customers will not only solve the issues mentioned above. Still, it will also contribute to the overall user experience on the website.
As Easy to Use WooCommerce Sizing Solution

As the name would suggest, Kiwi Size Chart & Fit Recommender for WooCommerce is a simple yet powerful WordPress plugin that will allow you to cater to every customer’s need by implementing a convenient size chart and fit recommender. As this has been a feature too long overlooked in the fashion business, especially online shops, it’s high time every fashion e-commerce store owner got their hands on a handy sizing tool like this one.
Everything you want to do is made easy through this plugin which offers three different types of size recommenders, including a generic recommender, an advanced recommender that works through machine learning of body size, age, height, and a custom one that allows the user to create their system based on what they think is best.
In addition to the recommender, this tool also allows you to create sizing charts for your online store. The chart layouts are flexible, and they can be customized to the highest degree to match your products to a tee. Plus, if you’re not into the whole do-it-yourself spiel, there’s always an option to choose a pre-existing template and work from there. The entire thing is as simple as one, two, three. There are more features to this plugin, and if you want to check it out for yourself, this is the best place to do it.
Integration with WooCommerce
In case you didn’t already catch on, this plugin is compatible with Shopify and WooCommerce. There are a few integral steps to integrate your online store with WooCommerce, but it is pretty simple, so bear with us for a minute. Once you’ve activated the plugin, navigate to “Settings.” This page should contain the integrations tab. Login to the KiwiSizing App, and you should be able to see your shop ID in the top right corner. Copy the ID and paste it into the Shop ID field found on your “Settings” page.
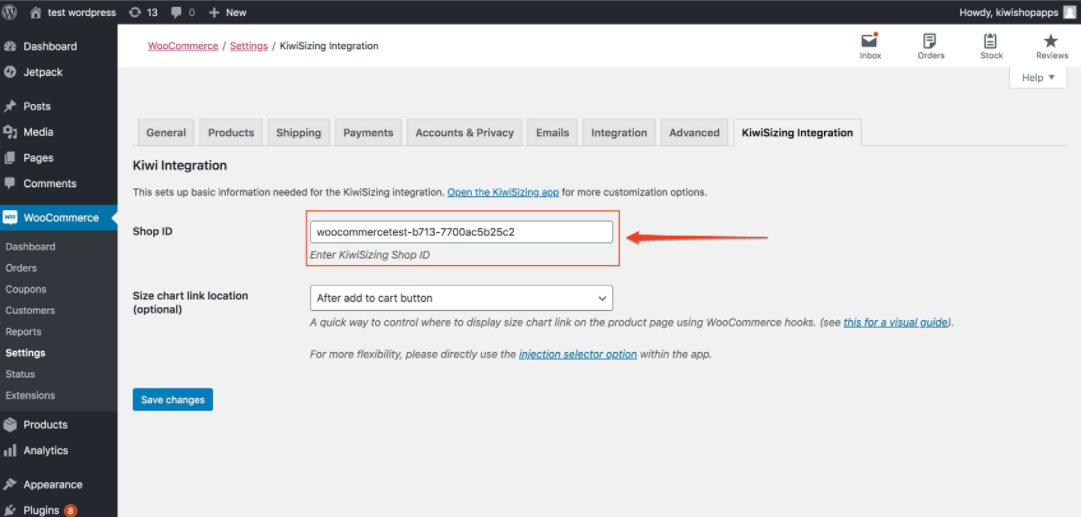

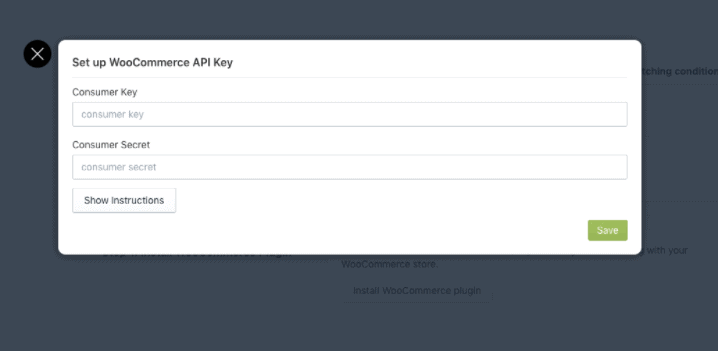
After this, your shop is for all practical intents and purposes integrated with the plugin. However, you will also need to add API integration so that the plugin can have access to the product catalog information. Creating size charts and fits recommendations much easier as the sizing tool can link size charts to products.
Go back to the Kiwi app and click on “Shop Integration.” Find the “Add WooCommerce Key Options” and follow additional instructions provided there if need be.

When the setup is complete, the KiwiSizing app will have access to relevant information regarding the products on your site. By choosing the “product select” option, you’ll be able to see all of the products found in your store, and other matching options will be complete with a dropdown menu showing available values from the store.

How you wish to set up the conditions themselves is up to you, but it is also worth mentioning that once you’ve done this, the app will provide you with an estimate of how many products in the store match the conditions. (This is related to the sizing chart and will be explained in further detail later.)
Creating the First Size Chart for Your Shop

Our next stop is showing how to create a size chart for your business. This is pretty much a must-have feature for any fashion business looking to boost conversion and keep their customers happy and returning to their online shop time and time again. It’s is worth mentioning that you should complete the previous steps before getting into this one.
So, let’s kick things off. The Kiwi Sizing admin page has an option called “ Create New Sizing Chart,” and this is where the magic happens. Once the editor is up and running, all that’s left is to choose a typical design from a whole heap of ones offered and commence the process.
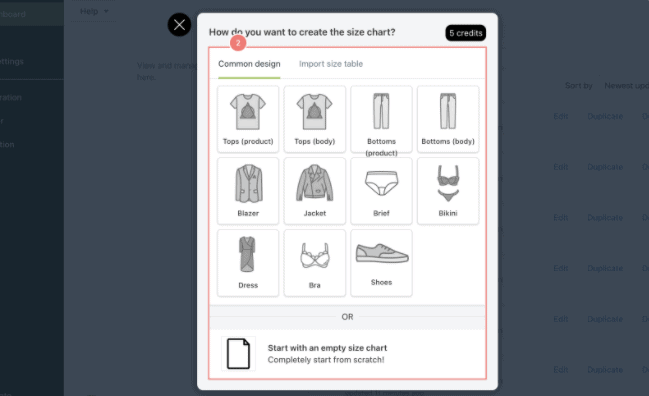

The charts are created based on product categories to make the whole thing that much easier. As was previously alluded to, there’s an option to select a chart template that suits you best, but if there isn’t one that works for whatever reason, you can also start from scratch by opting to go with an empty size chart and create your own.
If you went with the “blank canvas” option, all of the details would be empty, but you can upload a sizing chart from your computer or the cloud to remedy this if you have one in place already. But, if you opted for a premade layout, you’ll be glad to hear that pretty much everything is already set in place.
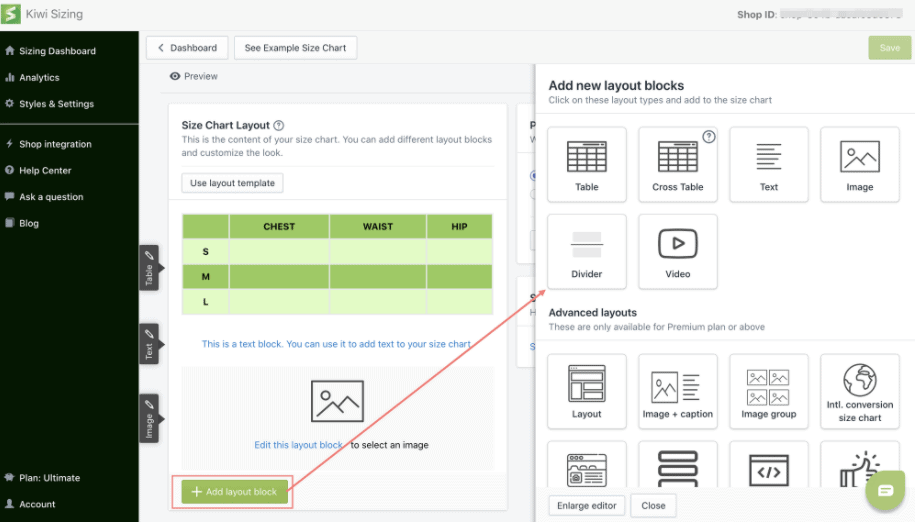
A size chart with unit conversion setup beforehand to a particular section teaches customers how to take the measurements themselves. All that’s left for you to do is to customize the size table, upload product images or edit the chart style by clicking on “settings.” Editing it is not compulsory, but we do recommend doing it so that everything matches the site’s overall aesthetic.
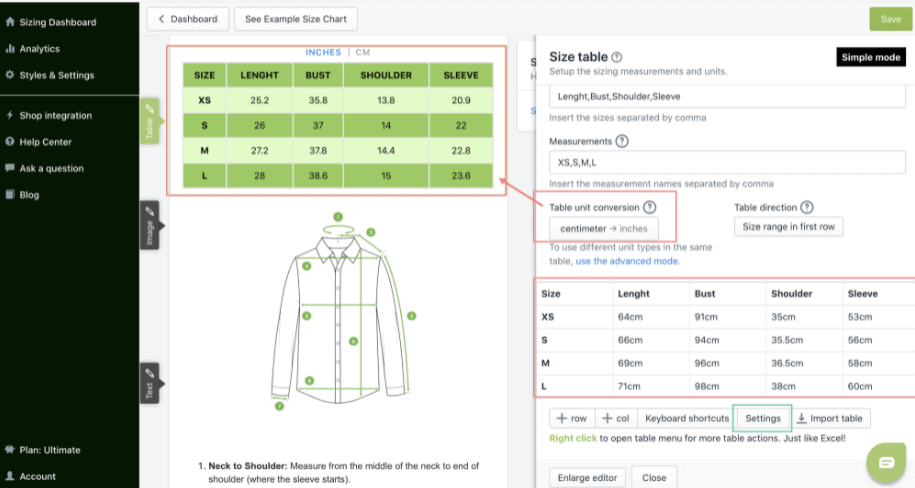

In case of starting from scratch, measurements will have to be put into the table manually. This can be done by just copying the numbers you already have of the apparel you’re selling.
These are the basics, but customers always want more details and information to complete their purchase. For your potential shoppers to find the best fit, it’s most advisable to add more relevant information, such as images, videos, or a size recommender – but more on that later.
By simply clicking on “Add layout block,” you’ll be greeted with a clear overview of all the options available. Set up the details to your liking, and then adjust the order by clicking on the “move up” or “move down” buttons. It is that easy.

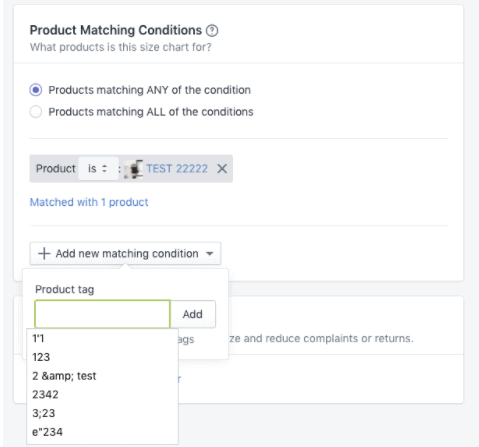
The last step is to set up a product matching option to know which product the chart is for. Click on “ Add new matching condition,” and you’ll be presented with all the possible options. The app also has a handy feature for product-heavy fashion stores. By clicking on the “Product” button, you can manually text search for the items you wish to add.
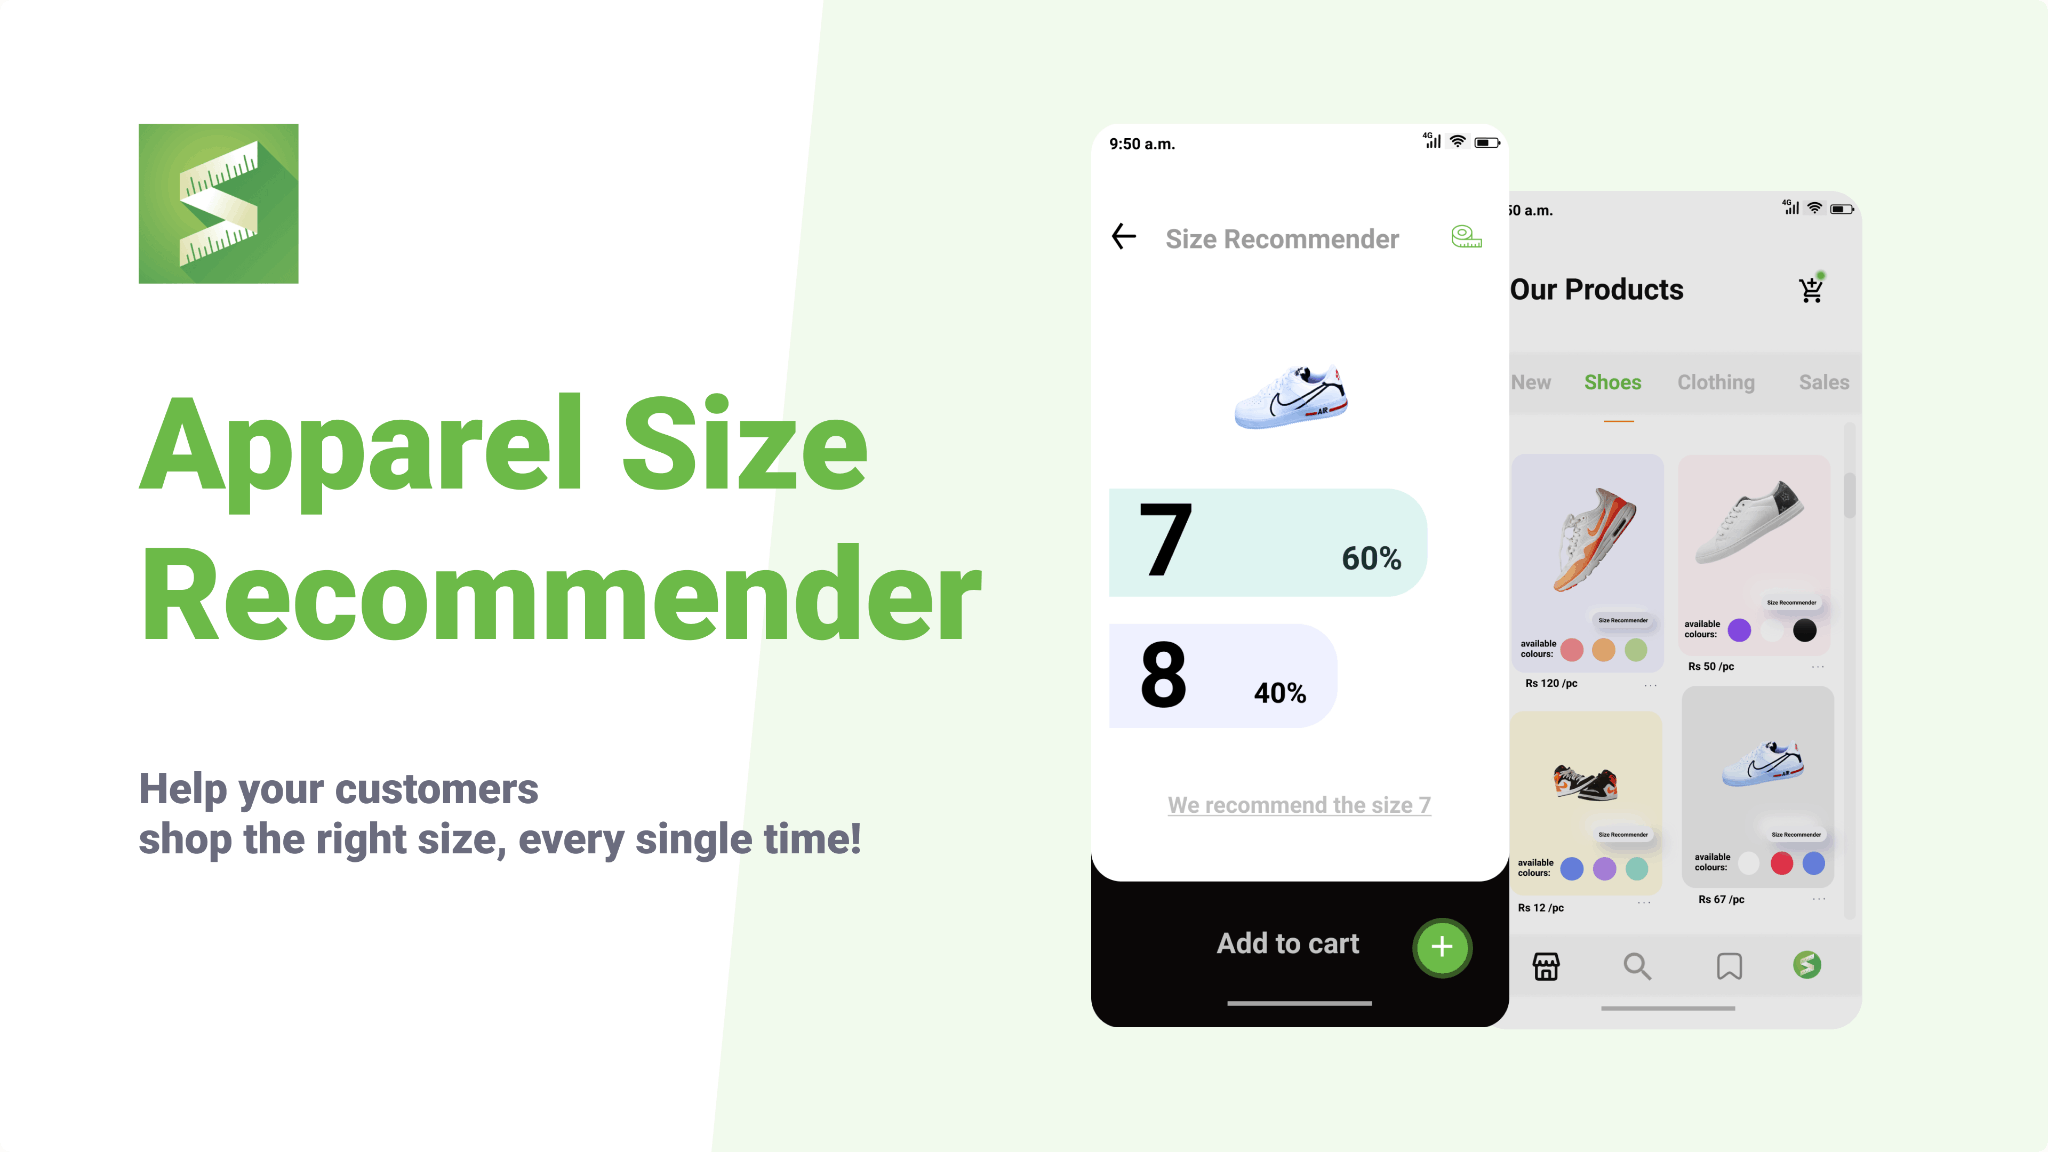
Taking it To The Next Level With a Fit Recommender
A size chart will already have to be in place to implement a fit recommender, so keep in mind there’s no one without the other. This might seem overly self-explanatory even to mention, but you never know. So, once your size chart is all done up, click on the “Size Recommender” tab.
There are three different options to choose from—the generic works based on the number you put into your size table. The custom allows you to create something wholly unique and go by your logic. But the one most tend to choose, and for a good reason, is the “Advanced Apparel Recommender.” This feature uses machine learning to make the best recommendations possible. And remember what we said earlier about returns and customer satisfaction; this is the one to look to.
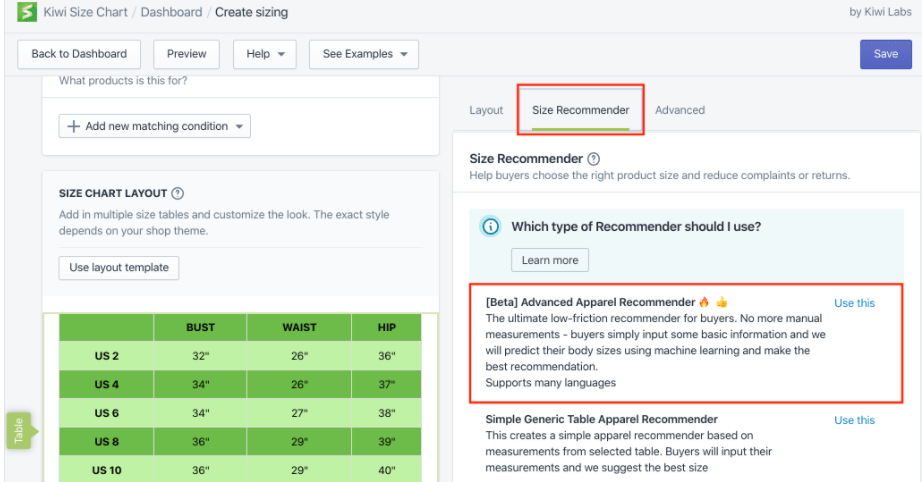

The next thing is to choose a source table; if you only have one set up, this one will be automatically picked out. However, if you have more, the app will ask you to choose which one to use. On the next tab, you’ll find additional product info that needs to be added, such as gender, age, and product category. Let’s say we use “female” and “dress.”


Soon enough, a card will pop up, asking you to select fields. This shows the measurements from your table. The recommendations will be based on this, and it is advisable to choose the three most relevant ones. For a dress, those would probably be waist, chest, and bust. To work, the appropriate recommender requires canonical measurement, so choose the “ Not Selected” button, and you’ll see a list of measurement fields to fill out.
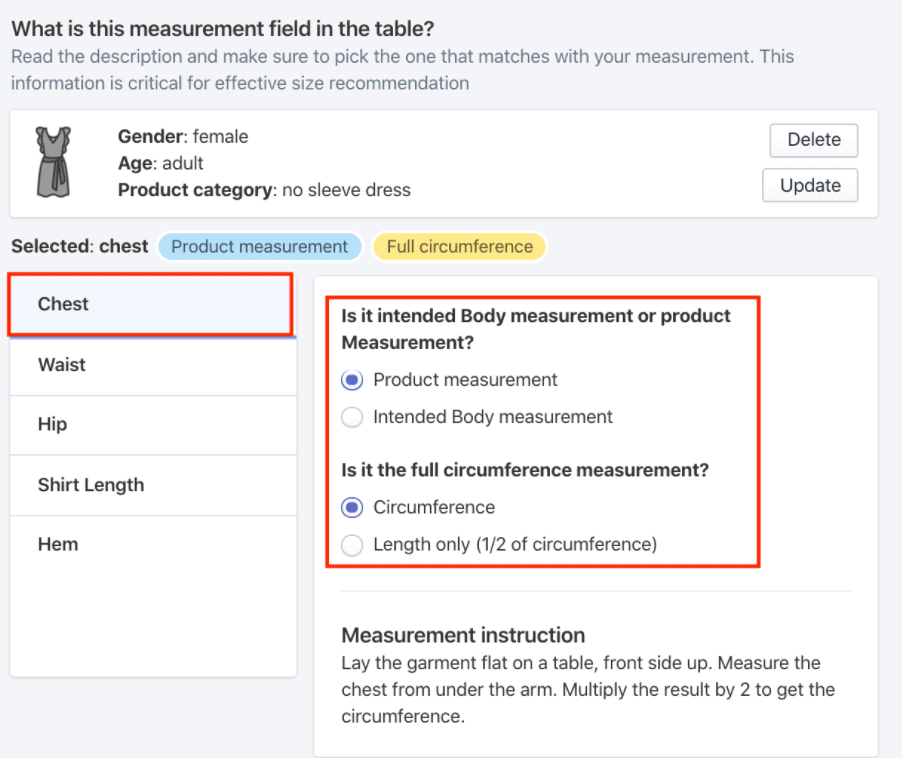

It’s important to note that you should read the description closely and choose what fits the best. When the canonical measurements have been set up, the last step is to customize the recommender configuration. This is how much a person’s measurements can deviate from your original ones and still have that size recommended to them. The default is 10%, but you can customize this if the material is very stretchy or the garments in question happen to be somewhat oversized.


And that’s it. You’re done. Your site now has both a size chart and a fit recommender using one simple sizing tool.
Wrapping Up
Kiwi Size Chart & Fit Recommender for WooCommerce is more than just a tool to complete your shop. It’s an excellent add-on for any online store dealing in fashion, as it’s not only going to make your buyers happier, it will also increase your revenue by lowering returns and building trust.
If you’re interested to see how all of this looks put into practice, check out the demo shop. You won’t be disappointed.
If you’re running an eCommerce business, think about using the WooCommerce Order Export plugin and the WooCommerce Table Rate Shipping plugin for more efficiency.
A plugin called WooCommerce Order Export lets you export your orders and product data from WooCommerce. There are filters that you can use to get only the information that you are interested in. Some of the things it can do are export all the data you need, send the exports to your inbox or FTP automatically, change the order of the columns, set up multiple exports, and more.
WooCommerce Table Rate Shipping plugin can be used to make shipping more efficient and add rule-based methods to figure out the final shipping fee. It has custom prices and is broken down into groups to take into account every part of the order. There are a lot of features, and some of them include advanced shipping rules that are based on the weight, number of items, and more. You can also use force shipping methods, and you can make unique shipping method names and use shipping classes to build fine-grained rules with this top-of-the-line plugin.