Backup WordPress Site by WPvivid – Securely Backup Your WordPress Website
You obviously know about the importance of a backup plugin on your website. I would say, that backing up your WordPress database is one of the most crucial tasks if you are into handling websites.
Today, we are going to talk about the Backup WordPress Site by WPvivid WordPress plugin that will help you backup your website and make sure you never lose your data no matter what complications your website faces.
Let’s begin by knowing what the plugin is all about.
What is Backup WordPress Site by WPvivid?
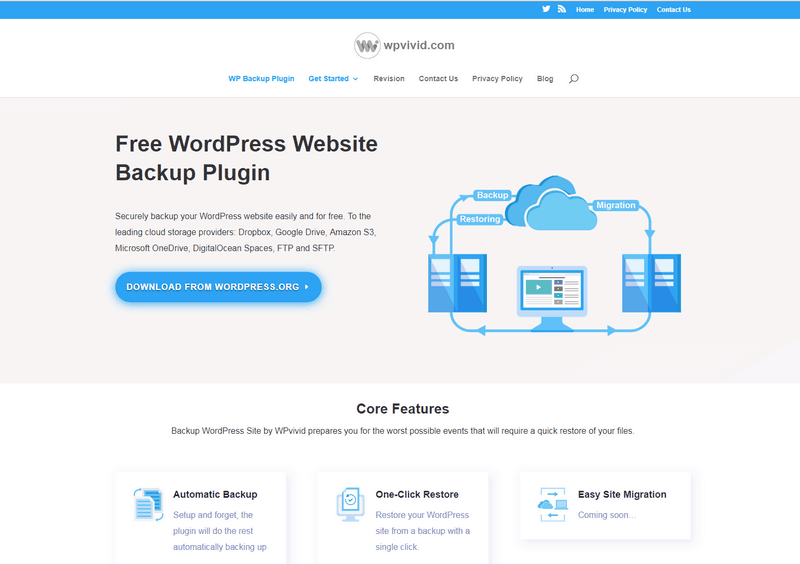
Backup WordPress Site by WPvivid is a brilliant WordPress backup plugin, that makes it easier for you to keep your data safe and secure. It automatically backs up all your files to cloud storages and lets you restore all or any of it with just a click of your mouse.
You can do it to any cloud platform. It may be Dropbox, Amazon S3, Microsoft OneDrive, Google Drive or anything else that you might be using. You can either do it manually or schedule the entire backup process. It also lets you restore your backup right from your WordPress admin dashboard.
The plugin exhibits wonderful performance with a remote SFTP server too for both backing up and restoring your data.
Overall it’s a clean, user-friendly and high-performance plugin that can definitely take off a lot of burden from your shoulders. No wonder it has managed to bag a 5-star rating on the WordPress repository.
Will It Work For Your Host?
WPVivid has cleared the extensive tests done on multiple shared and dedicated hosting plans. It works seamlessly on all kinds of hosting platforms if you have WordPress as your CMS. So far it has shown great results on hosting platforms like GoDaddy, Hostgator, SiteGround etc.
Requirements
To use it, you just need to have PHP version 5.3, MySQL version 4.1, WordPress 4.5 and Character Encoding UTF-8. Now, these are not something that you have to purchase separately or go the extra mile to have them. Almost every modern website has these things by default and we are sure, your’s will have it too.
Features of Backup WordPress Site by WPvivid
WPVivid is packed with amazing features. Each of them will add a new dimension to your website. Here’s a complete list of what you will get.
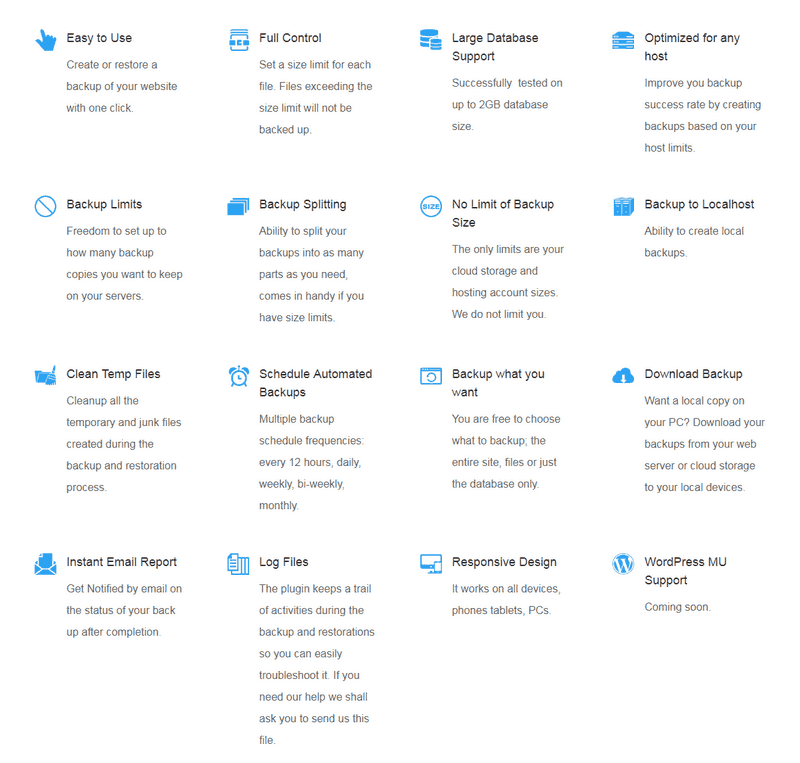
- Manual Backup
- Filter Large Files
- Large Database Support
- Optimized for any host
- Backup Limits
- Backup Splitting
- No Limit of Backup Size
- Backup to Localhost
- Clean Temp Files
- Schedule Automated Backups
- Customize Backup Content
- Download Backup
- Instant Email Report
- Log Files
- Responsive Design
- WordPress MU Support
Let’s now have a look at its installation and settings.
Installation and Settings
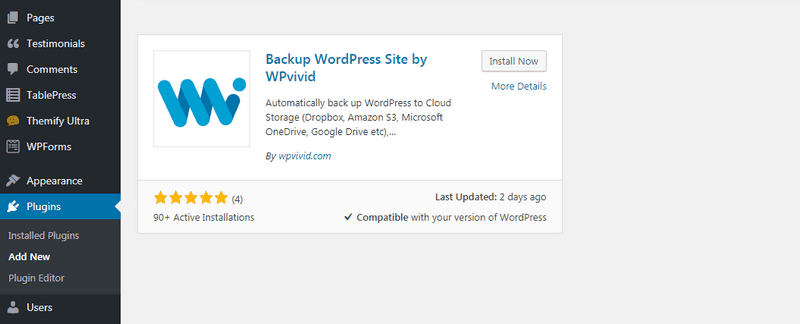
Installing the Backup WordPress Site by WPvivid plugin is just like installing any other WP plugin. Go to the tab Plugins in your dashboard, select Add New, Search for Backup WordPress Site by WPvivid, click Install Now and Activate.
You can also download the plugin and then save it on your computer. Now go to your WordPress website dashboard>Plugins>Add New>Upload. Now click on the upload button and browse through your downloaded files to find the WPVivid plugin folder. Hit the Upload button and then activate the plugin for it to start working.

When your activation process is complete, head on to set up the plugin. On your WordPress dashboard, go to WPVivid. You will have the following window on your screen with different tabs. The first is the Backup & Restore tab.
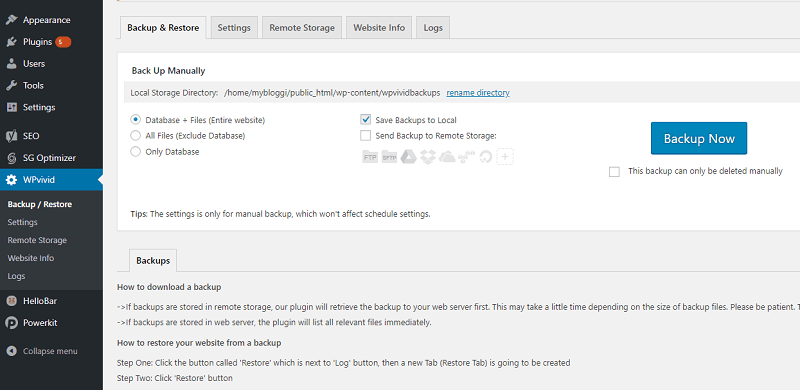
This is where you can change the settings to meet your requirements. For example, in the above image, you will see options for manual backup of your website. So here you can choose what to backup manually. You can do it just for your database or your files excluding the database or both together. You can also select where to store them. This has two options – one is the local and the other is to send them to remote storage.
There is also an option that says This backup can be deleted manually. You can check the box if you want to delete your storage later using the manual method. Once you have selected the options you want, click on the Backup Now option for the process to be completed.
Now go to the next tab.
Settings Tab
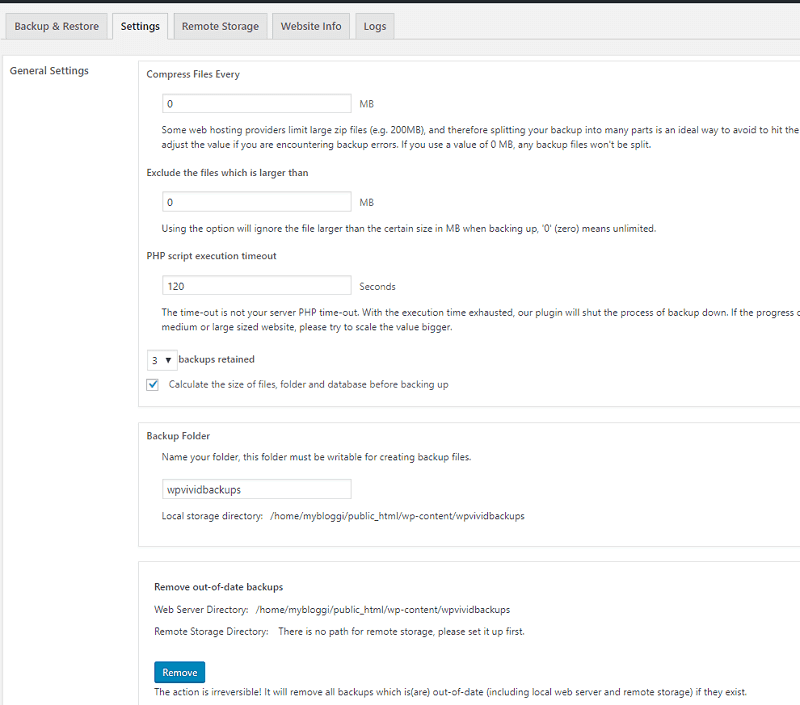
The next tab gives you options for the general settings. In the first part, you will have options to enter the size of files that you want to compress, exclude, execute PHP script etc. It also lets you have the option to calculate the size of your files and folders before they are backed up and the number of back-ups that you want to retain. You can easily choose the desired number for each of these options depending on your need.
If you scroll down the page, you will have a field where you can name your backup folder. You can also remove outdated backups. However, you cannot undo this step once you hit the Remove button. So be careful before using this option.
If you scroll down the page, you will see other options too that lets you schedule your backup, archive them, email reports of your backup etc.
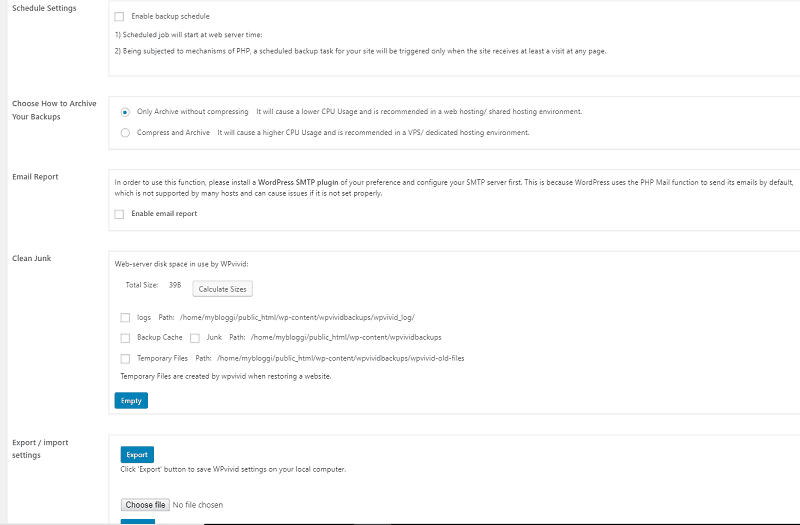
So if you check the first box, it lets you schedule your backup as per the web server timings. It also puts itself to work, as soon as your site receives a visit. So it backs up any comments or likes that a visitor leaves on your site.
The next option is to choose how you want your files to be archived. If you check the 1st option it will be work on your files without compressing them. As mentioned in the image, this one is recommended if your site is hosted in a shared hosting environment. It will save your CPU usage as well. Checking the 2nd option is recommended for VSP and dedicated hosting and it will definitely need more CPU usage.
Scrolling further down, you will have options to have the plugin email you a report of the latest backup. So if you check this option, you will be notified every time it backs up your website via email. You also have options to clear junk and import/export your WPVivid settings on or from your local computer.
Once you have made all the changes hit the save button at the end of the page. This is an important step because if you skip it, you will lose all the changes that you have just made.
Remote Storage
This tab basically lets you choose the platform in which you want to store your backup. They have 7 different options for that. FTP, SFTP, Google Drive, Dropbox, Microsoft OneDrive, AmazonS3, and DigitalOcean spaces.
Depending upon which of these platforms you are using, you can save your settings.
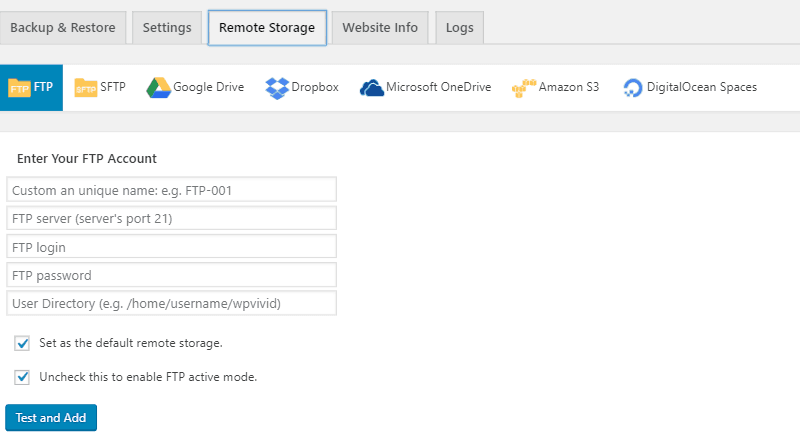
In the above picture, you can see the empty fields that ask you for the basic information about your remote storage. So if you are using the FTP as your option, you need to enter your unique name, FTP server, login, password, and your user directory. Below the fields, you will find options to set it as your default storage. You may or may not want to check this box. The Test and Add button makes the plugin start using FTP as your storage option.
I am not going into the details of each of these storage options individually. You can choose the one you are using and enter the relevant information in the fields provided to you. After completing your input click on the Test and Add button to save your settings.
Website Info
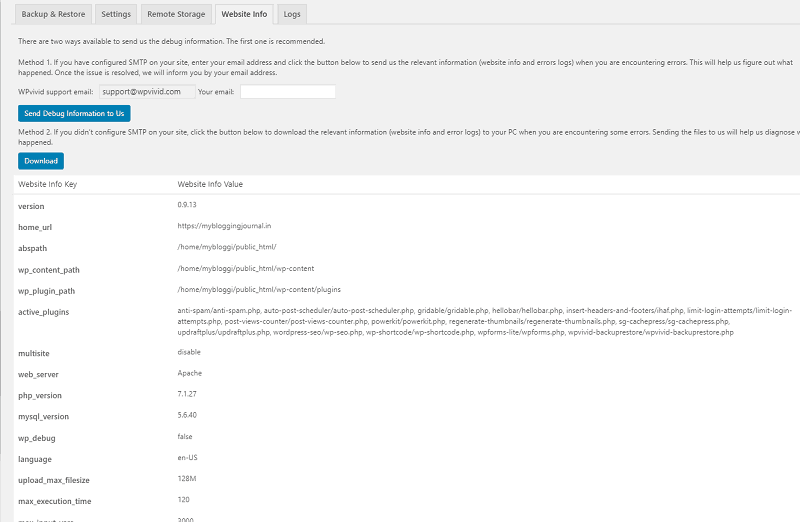
Moving on to the next one, you have the Website Info tab. This tab is to help you debug any problems that you face on your website. There are two ways to do it.
The first one just needs you to enter your email address. Clicking on the Send Debug Information to Us button will put your plugin to work and send the plugin support team all the error information that you are facing. However, this method will work only if you have SMPT installed on your website. Once the problem is resolved by the team they will email you the solution to your problem.
If there is no SMPT then follow the second method. This method lets you download the error information right onto your computer. You can then send the downloaded file to the plugin support team for them to help you fix it.
Log Tab
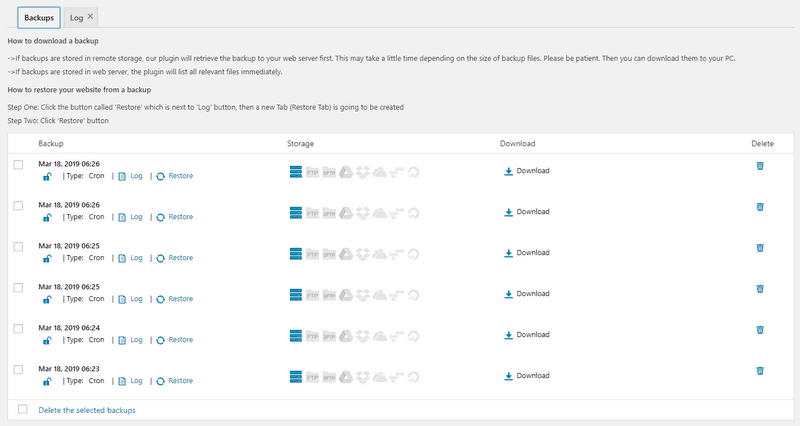
The next one is the log tab. Here you will find information about your backup. So you know when the backup was taken. It will also show you the remote storage destination where the backup has been stored. The download button next to your storage destination button lets you download your files to your PC. It even lets you delete a particular log if you want.
Support and Documentation
WPVivid offers brilliant support. Their team of experts is always ready to offer you any kind of help that you may need with the plugin. The plugin is also very well documented. They have a list of FAQs that answers almost every question that you might have regarding the plugin.

Price
Currently, the Backup WordPress Site by WPvivid plugin is available for download in the WordPress repository for free. The team behind the plugin is still working to modify it and plans to upgrade it with more features soon. A premium version is also in the works. It will provide helpful add-ons for advanced users.
Right now it’s an open source resource. So if you think it lacks a feature you can contribute towards making it better.
Conclusion
Overall it’s a great plugin to let you backup your website with ease. We are still waiting for the easy site migration feature that the team promises to come up with very soon. That was all about the plugin. We hope the review was helpful to you. Do let us know if you use any other backup plugin that has a better feature. We would love to hear from you.
- With MailPoet You Can Send Better Email For WordPress-Powered Websites - March 20, 2022
- The Pros and Cons of Gutenberg – The New WordPress Editor - April 17, 2019
- Backup WordPress Site by WPvivid – Securely Backup Your WordPress Website - March 24, 2019
Where Should We Send
Your WordPress Deals & Discounts?
Subscribe to Our Newsletter and Get Your First Deal Delivered Instant to Your Email Inbox.
