How to Create and Use an Image Gallery in WordPress
One of the most effective ways to enhance the user experience of your WordPress site and to encourage customers to come back again is to create an image gallery. Galleries offer a visual representation of your brand or company. They can help to showcase team profiles, new products or your latest photography campaign.
Between creating galleries, utilizing incredible plugins, and choosing your style and photos — there are many fine-details that contribute to the overall construction of a well-designed WordPress gallery.
Let’s dive right in so you can improve the aesthetics of your site, drive more traffic to it, and start experiencing the direct correlation between image galleries and your growing brand.
1. How to Create a Gallery
A WordPress gallery is a vital tool for your brand or company. Creating an image gallery is a creative way to showcase your work, your products, and your talent — and to ensure that your potential customers return to your site again in the future.
If it’s your first time creating a gallery, we’ll guide you through the simple process in a handful of steps below.
Choose the Right Spot
Your WordPress gallery can go wherever you’d like it to go. Place it on a post-mid-text — or on a page. Simply place your cursor in the right location, and you’re ready for step two.
Upload Your Photos
Add your images! To do so, click the ‘Add Media’ button. When the ‘Insert Media’ screen pops up, you will see the images in your Media Library and start building your beautiful photo display. Choose to upload images that are already in your media library — or start fresh by uploading from your computer. Select your photos, drag, drop, and your upload will begin.
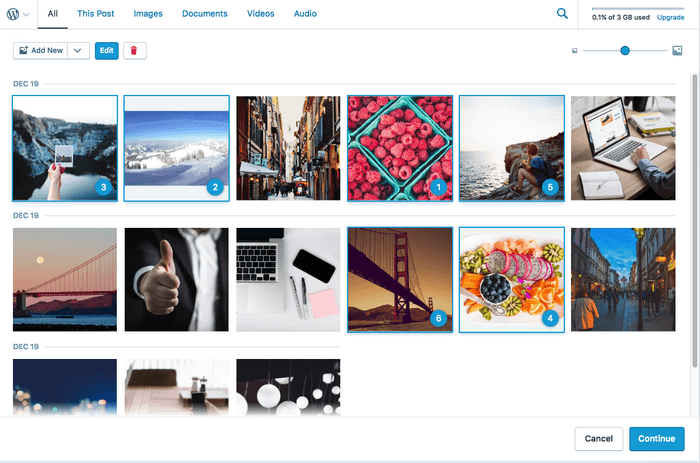
Edit & Insert Your Gallery
When editing the image gallery, you’re given the option to rearrange and reorder your images by dragging and dropping, add caption etc.
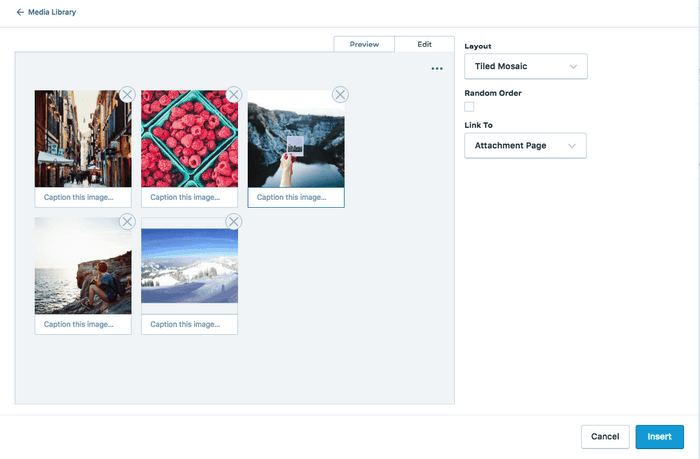
2. Different Gallery Styles
With WordPress, you have a few different options when it comes to how your image gallery is displayed on your page or post.
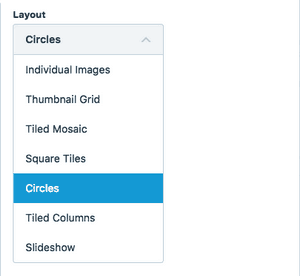
Thumbnail Grid is the standard default for how your galleries will appear. If you’d like to make the switch to a new layout, choose ‘Settings’ then ‘Media’ from the dashboard.
Tiled Layouts come in three different styles: rectangular, square, or circular and offer the option for text to hover over the images. These layouts are a neat way to display your work in a mosaic magazine-like type way.
Slideshows are another popular way to display your images on your WordPress site. Creating them is simple — after you’ve inserted your media, select the images you’d like and click ‘continue’ to see the gallery settings. Here, you’ll see a preview of the gallery and be able to change the layout to ‘slideshow’ with the layout drop-down menu. Select the edit tab to change the order or add captions. You can even check the box ‘random order’ so that each time the page is loaded, the images of the slideshow present themselves in different ways.
From here, click ‘Insert’ — and watch it come alive on your post or page. Click ‘Publish’ or ‘Update’ and you’re ready to share your image gallery with the world!
Quick tip: If you feel experienced enough, you can also use the WordPress Gallery Shortcodes.
3. Exploring WordPress Gallery Plugins
Now that you understand the basics of creating galleries, you might want to progress to something with more creative freedom (which will give you the ability to showcase your work even further). That’s where a WordPress image gallery plugin comes into play.
Many of them are easy to navigate for beginners and offer unique forms of customization that will help your site stand out from the crowd in a professionally and visually appealing way.
Here are some excellent options to get you started.
Gallery – Photo Albums Plugin

Gallery – Photo Albums Plugin is a very versatile image gallery portfolio plugin that’s easy to customize and lets you click around to explore and see what works best for your site. Add images, galleries, videos, Google Maps, special effects, and unlimited colors. As a bonus, this plugin will aid your image SEO by adding alt tags and title attributes. There’s even a free version if you’d like to test it out.
Grid FX Premium WordPress Plugin

Sold on CodeCanyon, GridFX is the plugin for the Pinterest lover and style-enthusiast in all of us. It offers incredible customization with 80 unique styling options where users can choose from colors, skins, and buttons. Choose everything from the item number in your image gallery to its size and columns.
Media Grid

Media Grid is the perfect plugin if you’re searching for a way to display additional information or text. Create your responsive gallery with images, sliders, audio and more — then kick things up a notch by making text appear when viewers hover over an image. Social sharing buttons make it easier for your images to be shared and discovered on Pinterest, Facebook and more.
Envira Gallery
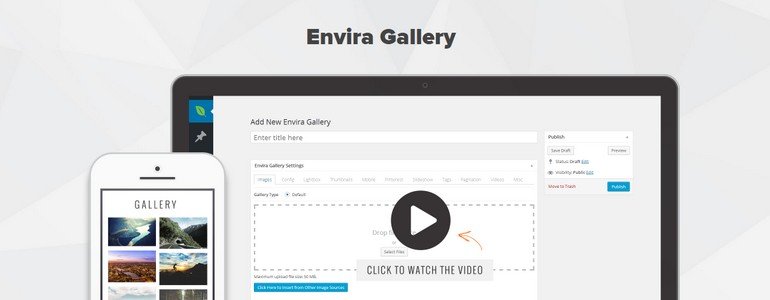
A popular and super responsive choice, Envira Gallery provides beautiful results in an easy-to-maneuver interface. Customization settings allow you to choose everything from margin sizing to animation and layouts. Plus, there’s a free version (which comes with one gallery theme).
NextGEN Gallery

Since 2007, NextGEN has been one of the go-to options for galleries. Created by Imagely, it offers endless options for uploading and editing your images. It has an intuitive gallery wizard which makes things absurdly simple by taking you step-by-step through the creation of your image gallery. With this plugin, you can even publish a photo of the day and allow visitors to upload images of their own.
4. Reasons to Use Photo Galleries
There are a variety of reasons to implement photo galleries on your WordPress site. From portfolios to team profiles, here are some reasons why using galleries is good for your personal site, your brand, or your company.
Personal Portfolio
Whether you’re a photographer, a food stylist, a makeup artist or a graphic designer — adding photo galleries to your website is a direct way to increase customer traffic and generate more leads for your business. In essence, galleries enhance the user experience on your site. And positive user experience is what will make your portfolio come to mind the next time someone is in need of your services or expertise.
Product Gallery
storEDGE states sites that contain high-quality images in addition to their relevant content get 94% more views than those that are strictly text-based. More visits to your site mean more chances to promote and sell your products. A product gallery will form an instant bond between your potential customer — and your product.
Team Profiles
Another way to achieve user engagement with your product or your company is to introduce customers or viewers to team profiles. Galleries provide the perfect way to do this. Simply upload a headshot (you can even snap it with your smartphone), throw on a cool filter, insert the images into a gallery — and you’re one step closer to promoting that stellar team you’ve created.
Guides and Tutorials
So you’ve started a home improvement blog and you’re looking for a way to create a visual step-by-step guide to help your users — put those photos into gallery-form and publish them. Allow your users to see the value and ease of your site, and they’ll be coming back for more in the near future.
Statistics and Graphs
If you’re looking for a way to visually represents statistics or graphs, galleries are a simple way to do so on your site. Numbers are a powerful tool. And utilizing both statistics and graphs can encourage trust between you and your audience.
SEO Enhancement
Adding images with appropriate tags and captions to your site makes it easier for search engines to find you (while simultaneously making it easier for people searching the web to find you, too).
Selling Images Through WooCommerce
If you are wanting to sell your photos or images through your website, WooCommerce is a great option. To create a professional looking image gallery, look no further than the WooCommerce Product Table plugin.
This plugin allows you to display any information you like about your products all within the image gallery view, and customers are able to search, sort and filter the table to quickly find the images they like. They can then select product variations or other options, and add photos to the cart directly from the WooCommerce gallery.
5. Choosing Photos for Your Image Gallery
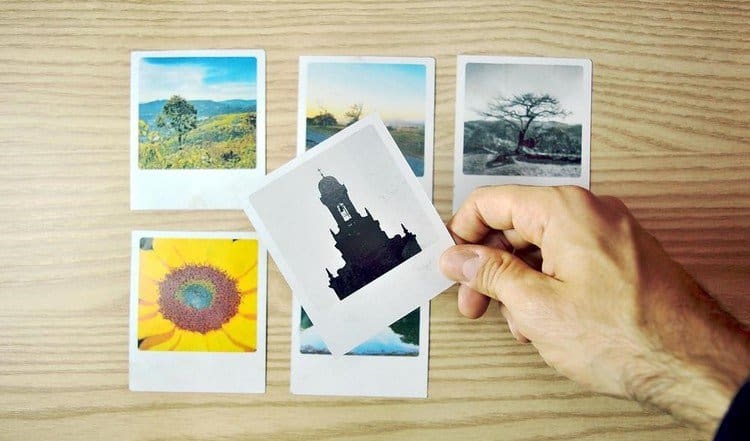
Now that you have an understanding of how to manage the galleries. Let’s focus on one of the key aspects of creating a successful gallery: the images themselves!
Choosing photos that engage your audience and keep them connected to your work is important. These galleries serve as your portfolio — and with them, they bring the possibility of endless creative opportunity. Here are some good things to keep in mind when choosing your photos.
Copyright
If you’re using stock images, check the copyright. Knowing the basics will ensure that you’re using images legally and protecting your content. Commercial use means that the images can be used for your products, services, advertisements and more. Editorial use means that they can be used for news and information. And finally, personal use means that they cannot be used for commercial gain (think: wedding announcements and social newsletters).
Photo Subject
It’s a simple idea, but it’s important: make sure the photos you pick follow the subject of your site. Images that reinforce branding offer a way for your audience to connect further with your site. Make sure your images relate to the point of who you are and what you or your company do. Make them specific, rather than generic, to give your viewers a chance to truly understand what your site is all about.
Correct Formatting
When it comes to choosing the right format for your photos, the three most common file formats are JPEG, GIF, and PNG. JPEG is the most commonly used and is supported most everywhere — it also ensures that the file sizes are kept small. GIF is used for things like animation, art and logos and PNG is today’s alternative to both JPEG and GIF. However, because PNG is a newer format, it’s not supported as widely as the others.
Remember that your page loading time is directly related to the size of the content you’re posting. Keep in mind that although your image might look best in high quality at 30MB. It’s not a good idea to upload this size onto your site. Something like 1MB, for example, is the better way to go. Choose the smallest file size possible, without sacrificing the quality of the image.
Photo Quality
Similar to photo subject, the quality of your photo is key, too, when it comes to galleries. Stay clear from overused stock photos that make your brand seem less memorable or too closely related to another site they’ve seen. When possible, use your own images and enhance them in a way that makes them stand out.
Try an editing software which suits best style and skill level and allows you to perform professional edits. Most editing software, like Photoshop, Luminar, or GIMP come equipped with advanced editing tools like layers and filters to give your image gallery its own creative feel.
Wrapping Up
Whether you’re looking to promote your products, your team, or your portfolio — implementing photo galleries into your WordPress site is a creatively impactful way to promote your brand.
The importance of visual media for the user experience will just keep growing. So, what will you put in your image gallery today?
Good luck! We’re excited to see what you create!
- How to Create and Use an Image Gallery in WordPress - August 2, 2018
- The 6 Best WordPress Plugins for Starting a Photography Blog - February 6, 2018
Where Should We Send
Your WordPress Deals & Discounts?
Subscribe to Our Newsletter and Get Your First Deal Delivered Instant to Your Email Inbox.

